This is the first of the multi part series on Cassandra. In each part I will cover one aspect amount setting up, managing and monitoring Cassandra on Amazon Web Services.
In this first part I will focus on the setup of Cassandra on AWS.
#Deployment Model
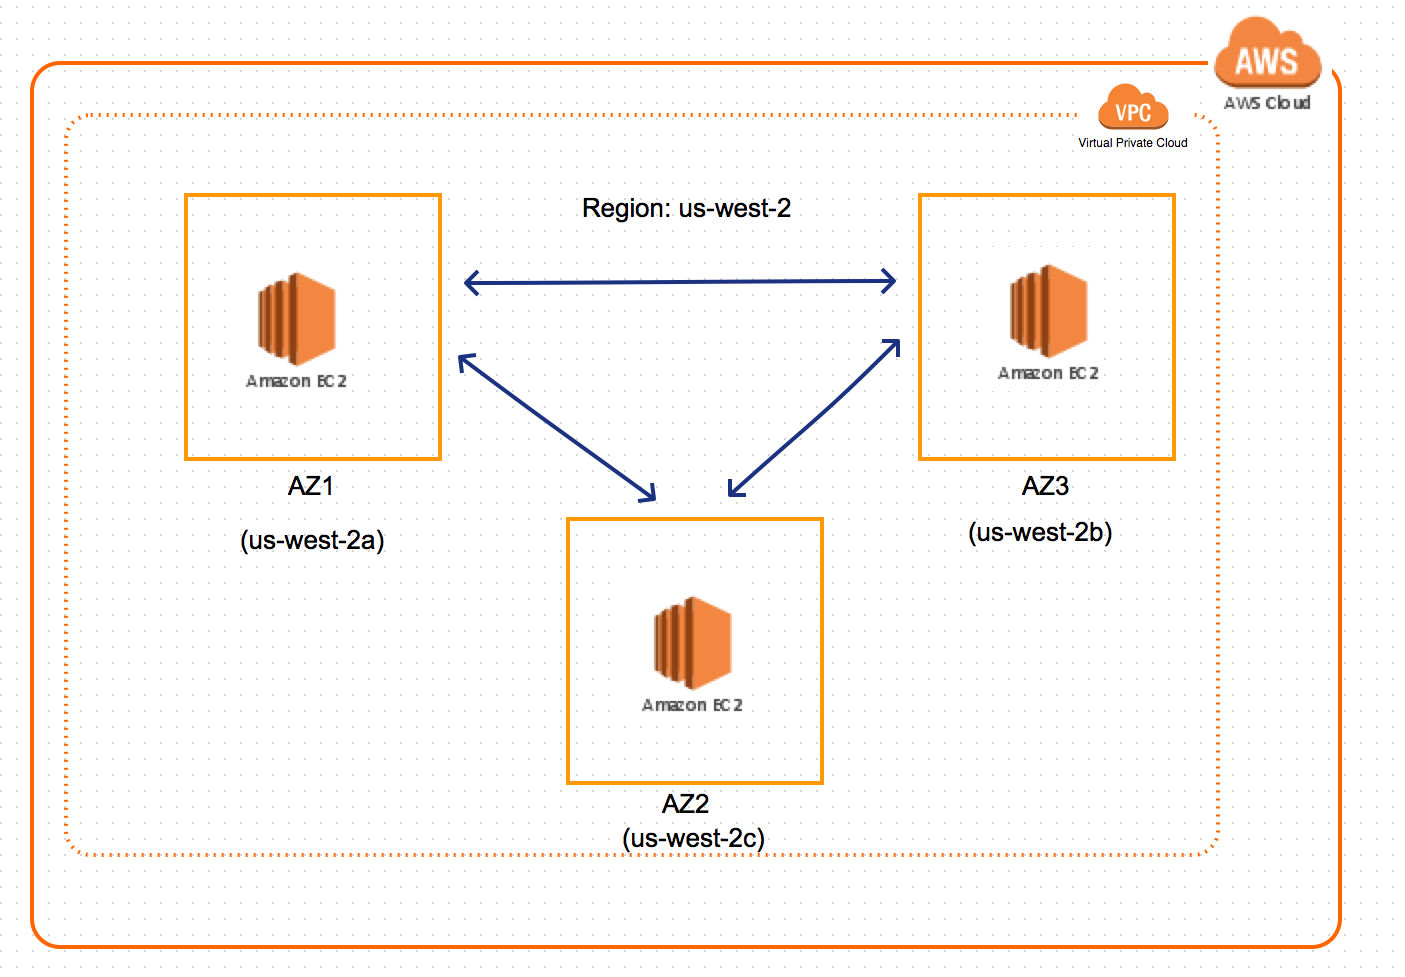
Cassandra will be set up as a multi-node cluster on AWS. AWS is spread over multiple regions and each region has multiple availability zones(AZ) within them.
Each region will start with at-least 3 nodes in a cluster. The nodes will be spread across different AZ’s. Most of the AWS regions have atleast 3 different AZ.
In regions where there are less than 3 AZ’s, two nodes will share the same AZ.
 </img>
#Setup
##AWS
- Choose a region which has three availability zones. For the purpose of this post, I have choosen us-west-2.
- Spin up one EC2 instance in each availability zone.
- Databased should always be on private subnets of VPC and should not be open to internet.
-
Update the firewall setting on the secutiry group associated with the EC2 instance to allow incomming traffinc on the following ports:
9042 CQL Client port 7000 Inter node communication on cluster
##Installable
-
Download Cassandra 2.2.4V from the below URL.
http://downloads.datastax.com/community/dsc-cassandra-2.2.4-bin.tar.gz
- Unzip it to a location on the EC2 machine.
- Do this on all three nodes.
##Cassandra Configuration
Make the below changes in the files present in the 1
/conf
1
File : cassandra-rackdc.properties
dc_suffix = 2a_cassandra   # Uniquely identify a node in a datacenter(DC).DC names are automatically assiged by Cassandra using EC2Snitch/EC2MultiRegionSnitch.
prefer_local = true
1
File : cassandra.yaml
partitioner: org.apache.cassandra.dht.Murmur3Partitioner  # This is the default and we will keep it as it is. Used to hash and distribute the keys across differnt nodes.

endpoint_snitch: Ec2Snitch  # Use EC2MultiRegionSnitch if you are setting up multiple clusters spanning different regions. Otherwise use Ec2Snitch

listen_address: 10.101.212.201  # This will be the private IP address of the EC2 instance. Will vary from instance to instance.

broadcast_address: 10.101.212.201  # private IP address of the EC2 instance.

rpc_address: 10.101.212.201  # private IP address of the EC2 instance

seeds: "10.101.212.206,10.101.214.60"   ## IP address of the nodes acting as seeds

key_cache_size_in_mb: 100000

data_file_directories:   # location where database files needs to be stored.
   -/local/mnt/cassandra/data

commitlog_directory: /local/mnt/cassandra/commitlog #location where the commit logs needs to be stored. </img>
 </img>
 </img>